Not to long ago Sterling B2B Integrator version 5.2.6 was released. There have also been a release of former SPE (Standard Processing Engine), now named ITX Advanced (IBM Transformation Extender). ITX is the new name on WTX (WebSphere Transformation Extender), and is released in two versions. ITX Standard and ITX Advanced. The Standard is former WTX and the Advanced is former SPE to put it simple.
My SB2BI 5.2.6 will be running on a RedHat Enterprise Linux 7 server, installed as a Minimum Install, so no Graphical User Interface is available. I will install using the IBM Installation Manager, and thus will configure X11 Forwarding.
Prerequisites
There are some prerequisites as well as some order in what to install first and last.
- ITX Advanced needs to be installed prior to SB2BI. This is because the SB2BI installation needs the path to ITX and ITX Advanced.
- Both ITX Advanced and SB2BI needs a database. ITX Advanced is prepackaged with a Derby Database, but since I have a DB2 database running anyway for my existing SB2BI 5.2.5 installation, I will use that server instead. And I will also create a new database for SB2BI 5.2.6 on my existing DB2 server.
- Both SB2BI and ITX Advanced uses IBM Installation manager. So since I am using a Minimum Install without GUI, I need to set up X11 Forwarding to get the IBM Installation Manager to work.
- The ITX Design Studio is only running on Windows. So I need a Windows machine as well. Since I am using a MacBook as personal computer, I will install ITX Design Studio on a Windows 2012 R2 Server where I am currently running WebSphere MQ. Have to reuse some of my servers…:)
- And at last I will need all the Install Medias.
X11 Forwarding
Since my SB2BI Server is without a GUI, I need to display the GUI on my host computer. So to do this I need a X Server on my host. Since I have a Macbook Pro, I download XQuartz to serve as the X Server (for Windows Putty would work).
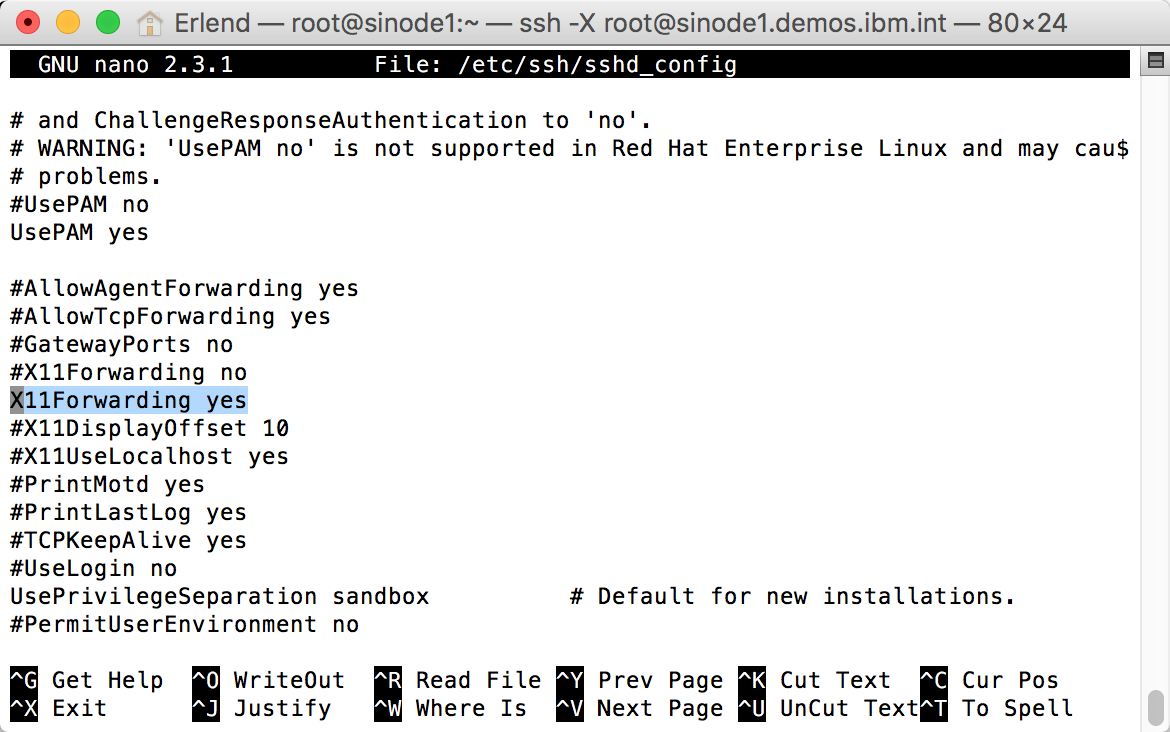
On my RHEL VM I need to activate X11. This is done in /etc/ssh/sshd_conf.
Next I need to export the DISPLAY variable and give it the IP of my host machine. I have added my host machine in /etc/hosts, and is therefore just using the name I have given it there.
To test it I have installed “xeyes”, just to verify that the configuration works.
Install ITX Advanced 9.0.0 for Integration Servers
I will install ITX Advanced on my Red Hat server. The ITX Design Studio will be installed on a Windows server since it is only working on Windows currently. The Database will be installed on a CentOS server running DB2 10.5.
Create Database
When installing ITX Advanced it is not put anything to the database, and by default the Derby Database is selected. But since I have chosen to run DB2 instead, I create a Database for ITX. Then I will change to DB2 after ITX Advanced is installed.
I create the Database by running the following command on my DB2 server (the SPE name is still in my head, and I don’t care to rename the database to ITX).
CREATE DATABASE SPE AUTOMATIC STORAGE YES USING CODESET IBM-1252 TERRITORY US COLLATE USING SYSTEM PAGESIZE 8192
I will cover more on replacing the Derby DB with the DB2 DB after ITX Advanced is installed.
Install ITX Advanced
Since I am planning to run ITX Advanced on a Linux RedHat server together with my Sterling B2B Integrator 5.2.6, the installation is a bit more complex than really necessary. The easiest thing would be to install everything on a Windows server, but why do it simple when it can be done the hard way?
The case is that the ITX Design Studio needs to be running on Windows OS. Thus I will install the Design Studio on Windows, together with the Industry Packs (Health Care and Supply Chain). The Industry Packs is used in the design of transformations, so they can be installed together with the Design Studio.
Then I install only the Core Components of ITX Advanced on my Linux Server. Prior to installing ITX Advanced I also need to install ITX for Integration Servers since I also would like to be able to run ITX Transformations within SB2BI and connect SB2BI and ITX Advanced. This is maybe not a standard Scenario, but since I am building a Demo solution, I like to have all flavors available.
Install SB2BI 5.2.6
The Upgrade itself is done by extracting the Media_IM_5020601.zip Downloaded. Then extract the IM_Linux folder. Change directory to the IM_Linux folder and run ./userinst.
PS: I had some issues with fonts missing, resulting in the Installation Manager popping up without readable text. I solved that my installing “dejavu-sans-fonts” and “dejavu-serif-fonts” on my Linux server. That solved the issue.
I have an old version of the IBM Installation Manager installed, so I start by upgrading Installation Manager to version 1.8.2.
When that is done, I run ./userinst again, to start upgrading SB2BI.


0 comments on “Install SB2BI 5.2.6 including ITX Advanced (SPE)” Add yours →